You get that butterflies-in-the-stomach feeling just thinking about your little one’s first spoonful, don’t you? We know it’s really scary to worry about getting it wrong. But look, introducing solid foods doesn’t have to be rocket science. The secret to getting off on the right foot is to focus on natural foods, very soft textures, and respecting your baby’s pace.
To ensure your child gets proper nutrition, opt for simple combinations like pumpkin and chicken or sweet potatoes and lentils. Here you’ll find 10 practical baby food recipes, designed for parents who don’t have time to spend in the kitchen but want to see their child grow up strong. It’s real food, made with love and just the right seasoning for this crucial stage.
Quick Guide to Introducing Solid Foods
| Main Combination | Focus Nutrient | Ideal Consistency |
|---|---|---|
| Pumpkin with Chicken | Vitamin A and Protein | Mashed with a fork |
| Sweet Potato with Spinach | Iron and Energy | Rustic Puree |
| Carrots with Lentils | Fiber and Iron | Very tender |
| Cassava with Meat | Zinc and Carbohydrates | Mashed texture |
| Chayote with Egg Yolk | Choline and Hydration | Cooked and mashed |
10 Nutritious baby foods to add variety to your menu
Choosing the right ingredients ensures that your baby’s sense of taste develops healthily. Avoid salt and sugar during the first two years; the natural flavor of the food is what matters most right now.
- Cabotiá squash with shredded chicken: Cook the squash until it falls apart, then mix it with finely chopped chicken.
- Sweet potatoes with spinach leaves: The sweetness of the sweet potatoes helps balance the strong flavor of the spinach.
- Carrots, lentils, and a drizzle of olive oil: The lentils should be very soft to aid digestion.
- Mandioquinha (yams) with ground beef: An excellent source of energy and easily digestible protein.
- Zucchini with well-cooked brown rice: The rice should be slightly overcooked so it’s easy to mash.
- Chickpeas with broccoli: Remove the skins from the chickpeas to prevent gas in your baby.
- Beets and potatoes: A colorful combination rich in antioxidants and energy.
- Chayote with hard-boiled egg yolk: The yolk is packed with healthy fats that are good for the brain.
- Mashed black beans with collard greens: A Brazilian classic that provides the necessary iron.
- Fresh peas with sweet corn: Use frozen peas (not canned) to preserve their nutritional value.
Tips to make your daily routine easier
Steam the vegetables to preserve as many vitamins as possible. If you're in a hurry, you can freeze the portions in small glass containers, but remember to mash them just before serving to maintain their original texture.
Expert Tip: Never use a blender to make baby food. Mashing food with a fork helps your baby exercise their facial muscles and makes it easier for them to accept solid foods later on.
How to vary the texture of meals
Start with food that’s thoroughly mashed, like a thick puree. As the weeks go by, leave a few small pieces so your child can learn to chew, even if they don’t have teeth yet—their gums are actually quite tough!
Include a variety of food groups on each plate. Always include a vegetable, a leafy green, a legume (such as beans), and a protein. This ensures your little one gets all the good stuff they need to grow strong.
Signs of readiness: How to tell if your baby is ready for solid foods
Giving that first spoonful can be a bit nerve-wracking, right? But don’t worry—your little one’s body will let you know when their digestive system and motor skills are ready. The green light usually comes on around 6 months, but chronological age isn’t the only rule to follow.
Your baby needs to show enough motor skills to swallow safely and avoid choking. If they can already hold their head up, show a keen interest in their food, and don’t push everything out with their tongue, the way is clear for their first solid foods. Watch their behavior and how they handle themselves at the table.
The milestone of balance: sitting without support
To eat safely, your baby needs to be able to sit up steadily. If they can sit up on their own or with minimal support, without wobbling from side to side like a "wobbly doll," their core is strong enough. This upright posture is essential for food to travel down the right path, protecting the airways.
The End of the Extrusion Reflection
Have you noticed that newborns automatically push anything that touches their tongue out of their mouth? This is the extrusion reflex, a natural defense mechanism. To begin introducing solid foods, this reflex must have diminished significantly. The baby must be able to keep food in their mouth in order to start swallowing.
Curiosity and motor skills
Active interest is a valuable indicator. If your child reaches out to grab what you’re eating or follows every bite you take with their eyes, they’re asking for a taste. Another key sign is the ability to bring objects to the mouth with precision, which shows that the connection between the brain and the hands is well-developed.
Check out this essential checklist to go over at home:
- Full head support: The neck should not be "floppy" or sagging.
- Genuine interest: He tries to grab the food or opens his mouth when he sees the plate.
- Hand-mouth coordination: Can pick up a toy and bring it straight to their lips.
- Reduced gag reflex: He stops "spitting out" everything that touches the tip of his tongue.
Expert Tip: Respect your baby’s pace and never force-feed. The World Health Organization recommends exclusive breastfeeding until 6 months of age; signs of readiness serve as a guide to ensure this transition is enjoyable and safe.
The importance of paying attention to the little ones
Don’t rush into starting just because your neighbor has. Introducing solids too early can put a strain on your child’s kidneys and digestive system. Wait until all the signs appear together. When your baby is ready, the experience of discovering new flavors becomes a celebration—no tears, just plenty of messy fun.
Essential nutrients for healthy growth in the first few months
The introduction of solid foods is a turning point in a baby’s life. Until six months of age, breast milk provided everything a baby needed, but now the body requires specific nutrients to support brain development, bone growth, and immune system development. The secret isn’t in the amount of food, but in the nutritional density of each spoonful. To ensure your little one grows up healthy, you need to focus on iron, zinc, vitamin A, and healthy fats. These nutrients are the building blocks that support the rapid development of this first year of life.
Iron is the star of this menu. Around six months of age, the natural reserves the baby brought from the womb begin to run low, and their diet needs to meet this demand. Iron is vital for transporting oxygen in the blood and for preventing anemia.
The Role of Zinc and Vitamins
Zinc works in tandem with iron to ensure that the immune system stays strong and that physical growth proceeds at the right pace. Vitamins, such as vitamin C, play a key role: they "open the door" for the body to absorb iron from vegetables.
- Vitamin A: Essential for protecting vision and keeping the skin and mucous membranes healthy and free from infection.
- Vitamin C: Found in oranges and acerola, it enhances the absorption of iron found in beans and leafy greens.
- Healthy Fats: Olive oil and avocados provide the necessary energy and help develop the nervous system.
Expert Tip: Always try to squeeze a few drops of lemon juice or offer a citrus fruit right after the main meal. This triples the absorption of iron found in vegetables and grains.
Energy and Brain Development
Don’t be afraid of healthy fats. A baby’s brain is largely made up of fat and needs this fuel to form neural connections. A drizzle of raw extra-virgin olive oil, added directly to the finished dish, makes all the difference in its nutritional value.
Keeping meals varied is the quickest path to success. Each food color represents a different nutrient, so put together a colorful plate. This ensures that your baby’s supply of micronutrients is always up to date, giving them the energy they need to explore the world.
Step-by-step guide to safely sanitizing and preparing food
introduction to solid foods
food security
To ensure that baby food is pure nutrition and completely safe, the rule is clear: sanitize everything thoroughly. Start by washing your hands and the utensils you’ll be using very well.
Fruits and vegetables need to be thoroughly rinsed under running water and then soaked in a chlorine solution to eliminate bacteria and parasites that water alone cannot remove.
The safe cleaning ritual
- Wash your hands thoroughly with mild soap before touching food.
- Wash the vegetables under running water, removing all visible dirt and debris.
- Fill a bowl with 1 liter of water and 1 tablespoon of sodium hypochlorite (food-grade).
- Soak the food for 15 minutes, then rinse it with drinking water.
- Dry thoroughly before peeling or chopping to prevent moisture from causing the food to spoil more quickly.
A preparation that preserves nutrients
Always opt for steaming. This method is the secret to preserving the vibrant colors and vitamins your little one needs, since the nutrients aren’t lost in the boiling water.
When serving, skip the blender or strainer. Use a fork to mash the food, leaving small lumps that encourage your baby to chew and experience different textures.
Expert Tip: Never offer raw foods to babies when first introducing solid foods, except for thoroughly washed fruits. Cooking aids digestion and ensures that any heat-resistant microorganisms are eliminated.
Storage precautions
If you make extra food, store it immediately in glass containers with airtight lids. Glass is more hygienic and doesn’t release toxic substances when heated, ensuring a safe meal the next day.
Label the jars with the date they were prepared. In the refrigerator, the baby food will keep for up to 24 hours; in the freezer, you can conveniently store this nutritious food for up to 30 days without any loss of quality.
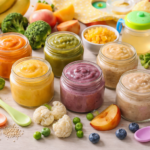
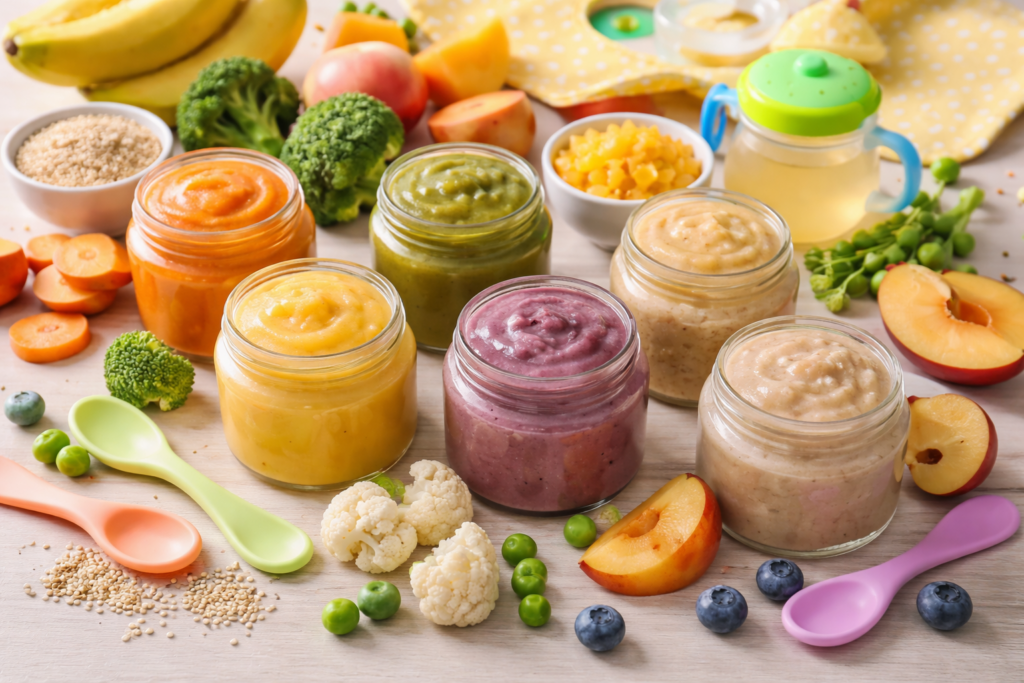
Recipes for colorful baby food rich in essential vitamins
Introducing solid foods is a celebration of discovery, you know! Serving up colorful baby food goes far beyond just looks: every color on the plate represents a specific essential vitamin for your baby’s growth. The secret to a strong immune system is variety, ensuring a natural supply of iron, vitamin A, and fiber. In these recipes, we focus on simple ingredients and cooking methods that preserve the food’s true flavor, no tricks involved. Preparing your little one’s food at home is an act of love that builds a healthy palate for life. Let’s see how to make this menu both nutritious and very appealing?
Golden Orange: Cream of Pumpkin Soup with Chicken
The color orange is synonymous with beta-carotene, which the body converts into vitamin A. This substance is essential for eye health and the development of a baby’s skin.
- 1 medium slice of chopped cabotiá squash;
- 1 tablespoon of shredded or finely chopped chicken breast;
- Half a small carrot, diced;
- A drizzle of extra-virgin olive oil.
Steam the vegetables to preserve their nutrients. Once they’re tender, mash them with a fork (no blender, okay?). Mix in the chicken and finish with olive oil to ensure you get some healthy fats.
Green Power: Broccoli and Sweet Potato Puree
Dark green vegetables provide the iron and folic acid needed to prevent anemia and aid in the formation of blood cells. Sweet potatoes are an excellent source of energy.
- Wash 2 bunches of broccoli thoroughly;
- Cook it along with a small peeled sweet potato;
- Mash everything until it reaches the consistency of a chunky purée;
- Add a pinch of chopped fresh parsley for flavor.
Expert Tip: To help your baby better absorb iron from leafy greens, offer a citrus fruit (such as an orange or acerola) right after the meal. Vitamin C is iron’s best friend.
Purple Energy: Beet and Cassava Puree
Beets are rich in antioxidants and magnesium, which help promote muscle relaxation and support the immune system. Combined with taro, they create a sweet flavor that kids love.
- Half a small beet;
- 1 medium-sized mandioquinha (baroa potato);
- Finely chopped onion, to be lightly sautéed.
Sauté the onion with a splash of water, add the vegetables, and cover with filtered water. Cook until they’re tender enough to melt in your mouth. Mash them well, leaving a few small pieces for the baby to practice chewing.
Top Tips for Preparation
Avoid using salt or pre-made seasonings during the first few months. Your baby’s palate is a blank slate, and they need to experience the true flavor of each vegetable.
- Use fresh herbs: Basil, parsley, and chives add a wonderful aroma;
- Adjust the consistency: If it gets too dry, use the cooking liquid to moisten it;
- Storage: You can freeze the portions in glass containers for up to 15 days.
The importance of progressive texture for the development of chewing
You know that fear of seeing your baby choke? We get it, but offering the right texture at the right time is the key to raising a child who eats everything. The gradual progression of baby food—from purees to solids—strengthens facial muscles, stimulates speech, and prevents your child from rejecting whole foods in the future. This process teaches your little one to manage food in their mouth, turning mealtime into a moment of learning and pleasure, far from the monotony of blended broths.
Strength training starts with a small plate
When a baby chews, it works its orofacial muscles intensely. This prepares the mouth for complex movements, even helping with word articulation and proper speech later on.
A baby's gums are tough and effective. Even without teeth, a baby can handle soft fibers and textures, as long as you give them the chance to practice their fine motor skills.
How to experiment with texture without hesitation
Forget the blender or the strainer. The goal is to safely and gradually challenge your little one’s tongue and gums, while respecting the pace of each new discovery.
- First few days: Mash the food thoroughly with a fork, keeping it at the consistency of a chunky puree.
- In the coming weeks: Leave a few small lumps so your baby can feel the texture of the food.
- At 8 months: Increase the size of the pieces, making sure they are well cooked and tender.
- Final step: Offer finger-sized food sticks for him to hold and bite into.
Expert Tip: Never strain your pet’s food. Straining removes essential fibers and makes the food too smooth, which discourages chewing and makes it harder for your pet to accept new flavors.
Goodbye, picky eating!
Children who are exposed only to smooth textures for a long time tend to reject solid foods after their first year of life. The brain needs this sensory experience early on to understand that food comes in different shapes.
Offering a variety of textures and consistencies on the plate sparks curiosity at the table. This helps prevent children from becoming "picky eaters" who will only accept mushy or processed foods in the future.
Safe ways to store and freeze baby food
To ensure that the baby food remains nutritious, the key is to cool it quickly and use airtight containers. It’s best to freeze it in individual portions immediately after preparation, avoiding leaving the food exposed to room temperature for more than two hours.
Use tempered glass or BPA-free plastic containers to avoid any chemical contamination. By following these step-by-step instructions, you’ll preserve the vitamins and ensure your little one’s food safety without any hassle or rushing around in the kitchen.
Choose the right containers
Glass is always the best choice because it’s easy to clean, doesn’t stain, and doesn’t retain odors from previous meals. It withstands temperature changes well and ensures that no plastic residue leaches into your baby’s food.
If you choose plastic containers, make sure they are freezer- and microwave-safe. Look for the "BPA-Free" label on the packaging to ensure that the material does not release bisphenol A when heated or cooled rapidly.
Golden Rules for Freezing
Put the food in the jar as soon as the initial steam from boiling stops rising. Don’t leave the baby food sitting on the sink counter for too long, as this attracts unwanted bacteria.
- Leave about an inch of space at the top of the container, since the food expands when frozen and could cause the container to break.
- Affix a label listing the ingredients and the date of manufacture so it doesn't get lost in inventory.
- The recommended maximum storage time in the freezer is 30 days to preserve flavor and nutrients.
Expert Tip: Never refreeze baby food that has already been thawed. The thawing process alters the food’s structure and promotes the growth of microorganisms that are harmful to your baby’s health.
How to thaw and serve
The safest method is to plan your meal and move the container from the freezer to the refrigerator the night before. This gradual process preserves the texture of the vegetables and prevents excessive water loss from the dish.
If you're in a hurry, use a double boiler over low heat, stirring constantly so the heat is distributed evenly. Avoid using the microwave to prevent "hot spots" that could burn your little one's sensitive mouth.
- Stir the baby food well after heating it to ensure it’s evenly heated.
- Always test the temperature on the back of your hand before offering the first spoonful.
- Discard any leftovers on the plate; the baby’s saliva on the spoon will contaminate the rest of the food.
Strategies to encourage acceptance of new flavors and textures
Accepting new flavors and textures is a process that requires learning and patience. Babies are born with a preference for sweet tastes, so getting used to bitter and sour flavors requires repeated exposure. Research shows that it can take up to 15 tries for a child to accept a new food. The secret is to offer the same ingredient on different days and in various preparations, without pushing too hard. Keep the atmosphere relaxed and let your little one explore the dish with their hands.
The rules for colors and formats
Vary the presentation of the dish to spark visual curiosity. If mashed pumpkin didn’t work, try serving the vegetable in soft cubes or sticks. Vibrant colors attract attention and turn mealtime into a moment of playful discovery.
Encourage independence at the table
Allowing your baby to feel the texture of food with their hands reduces their resistance. Touch is a child’s first safety filter. When they squeeze and feel the texture, their brain understands that this new “thing” is safe to put in their mouth.
- Offer the new food right at the start of the meal, when your child is hungriest.
- Eat together with your baby. A parent’s example is the strongest trigger for trust there is.
- Avoid distractions like screens or noisy toys so you can focus entirely on the taste.
- Mix a new food with one that your pet already eats well.
Expert Tip: Don’t label your child as a “picky eater” just because they refuse an ingredient. Their sense of taste is still developing, and every little taste is a victory in your child’s sensory and motor development.
Gradual transition to solid food
Don’t be afraid to adjust the consistency of your baby’s food. Start by mashing it with a fork and skip the blender or sieves. Foods with small pieces help prevent picky eating and support speech development by exercising the facial muscles.
Change up the seasoning, but skip the salt. Use fresh herbs like basil, parsley, or rosemary to give the dish some character. Babies discover the world through their mouths; the richer this experience is now, the easier their relationship with food will be in the future.
Frequently Asked Questions (FAQs)
What is the right age to start introducing these baby foods?
The World Health Organization (WHO) and the Brazilian Society of Pediatrics recommend starting solid foods at 6 months of age. At this stage, the baby’s digestive system is more mature, and the baby already shows signs of readiness, such as being able to sit up with minimal support and showing interest in adult food.
Can I use salt or store-bought broth when preparing these recipes?
It is not recommended to use salt, sugar, or processed seasonings in baby food for children under 2 years of age. A baby’s sense of taste is still developing, and they should experience the natural flavors of food. To add flavor to the 10 suggested baby food recipes, use fresh or dried natural herbs and spices, such as parsley, chives, basil, garlic, and onion.
Should baby food be blended in a blender or strained through a sieve?
Ideally, baby food should be simply mashed with a fork. Avoid using a blender or a sieve, as these methods make the food too runny and remove important fibers. Keeping small, soft pieces helps your baby develop chewing muscles and accept different textures later on.
How can I safely store and freeze baby food?
Nutritious baby food can be stored in the refrigerator for up to 24 hours or frozen for up to 30 days. Use glass or BPA-free plastic containers, making sure they are tightly sealed. To thaw, it is safest to leave it in the refrigerator overnight or use a double boiler, ensuring that it heats evenly.
What should you do if your baby refuses one of the baby foods?
Refusal is perfectly normal when first introducing solid foods. Your baby is discovering new flavors and textures, which can feel unfamiliar. Don’t force your baby to eat; instead, wait a few days and offer the same food again, prepared in a different way. Studies show that it may take up to 10 to 15 exposures for a child to fully accept a new food.
Conclusion
Starting your baby’s weaning journey with these 10 easy and nutritious baby food recipes is a crucial step in ensuring your baby grows up healthy and develops a positive relationship with food. By prioritizing fresh, natural ingredients, you provide not only essential nutrients like iron, zinc, and vitamins, but also a rich sensory experience. Remember that this is a mutual learning process, where patience and paying attention to your baby’s cues are just as important as the nutritional value of what’s on the plate.
By following the guidelines for preparation, texture, and presentation, you lay the foundation for healthy eating habits that will last a lifetime. The transition to solid foods should be gentle and enjoyable, turning mealtime into a moment of discovery and affection. With planning and the right recipes, this new phase will be a success, ensuring your little one starts this culinary journey on the right foot and with plenty of vitality.